

 Previous
LEAVE A REPLY
Your email address will not be published.Required fields are marked *
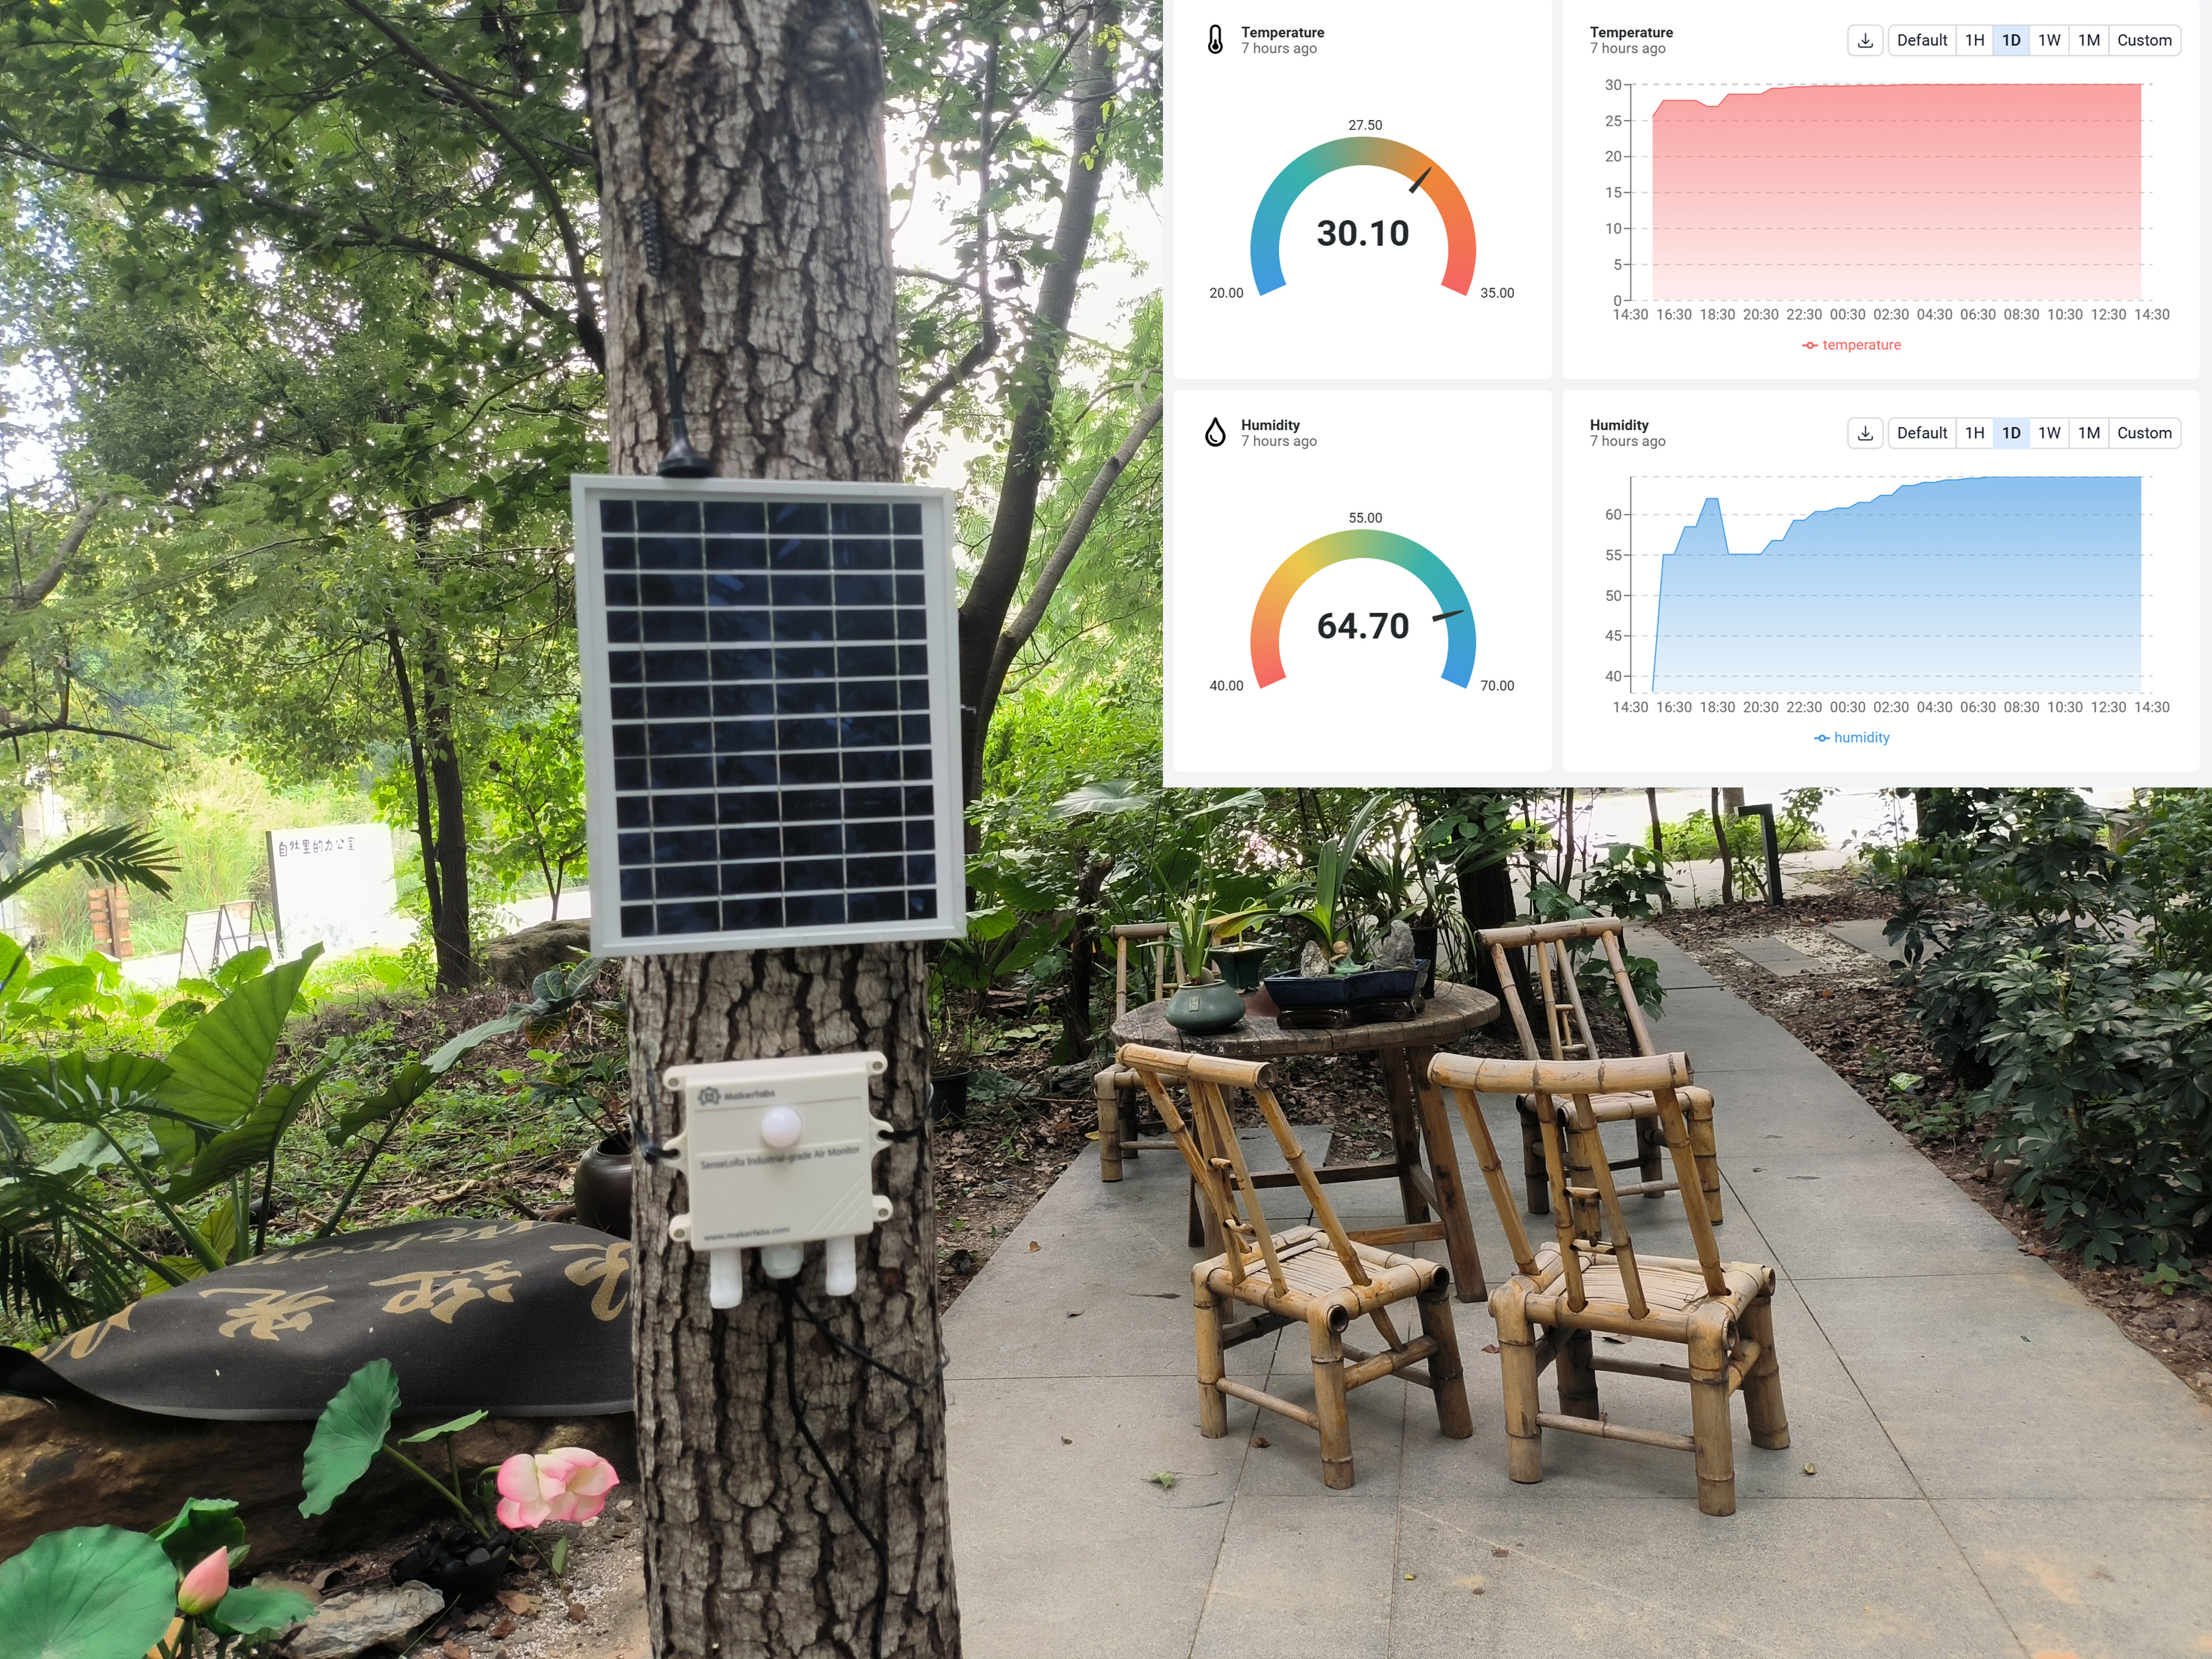
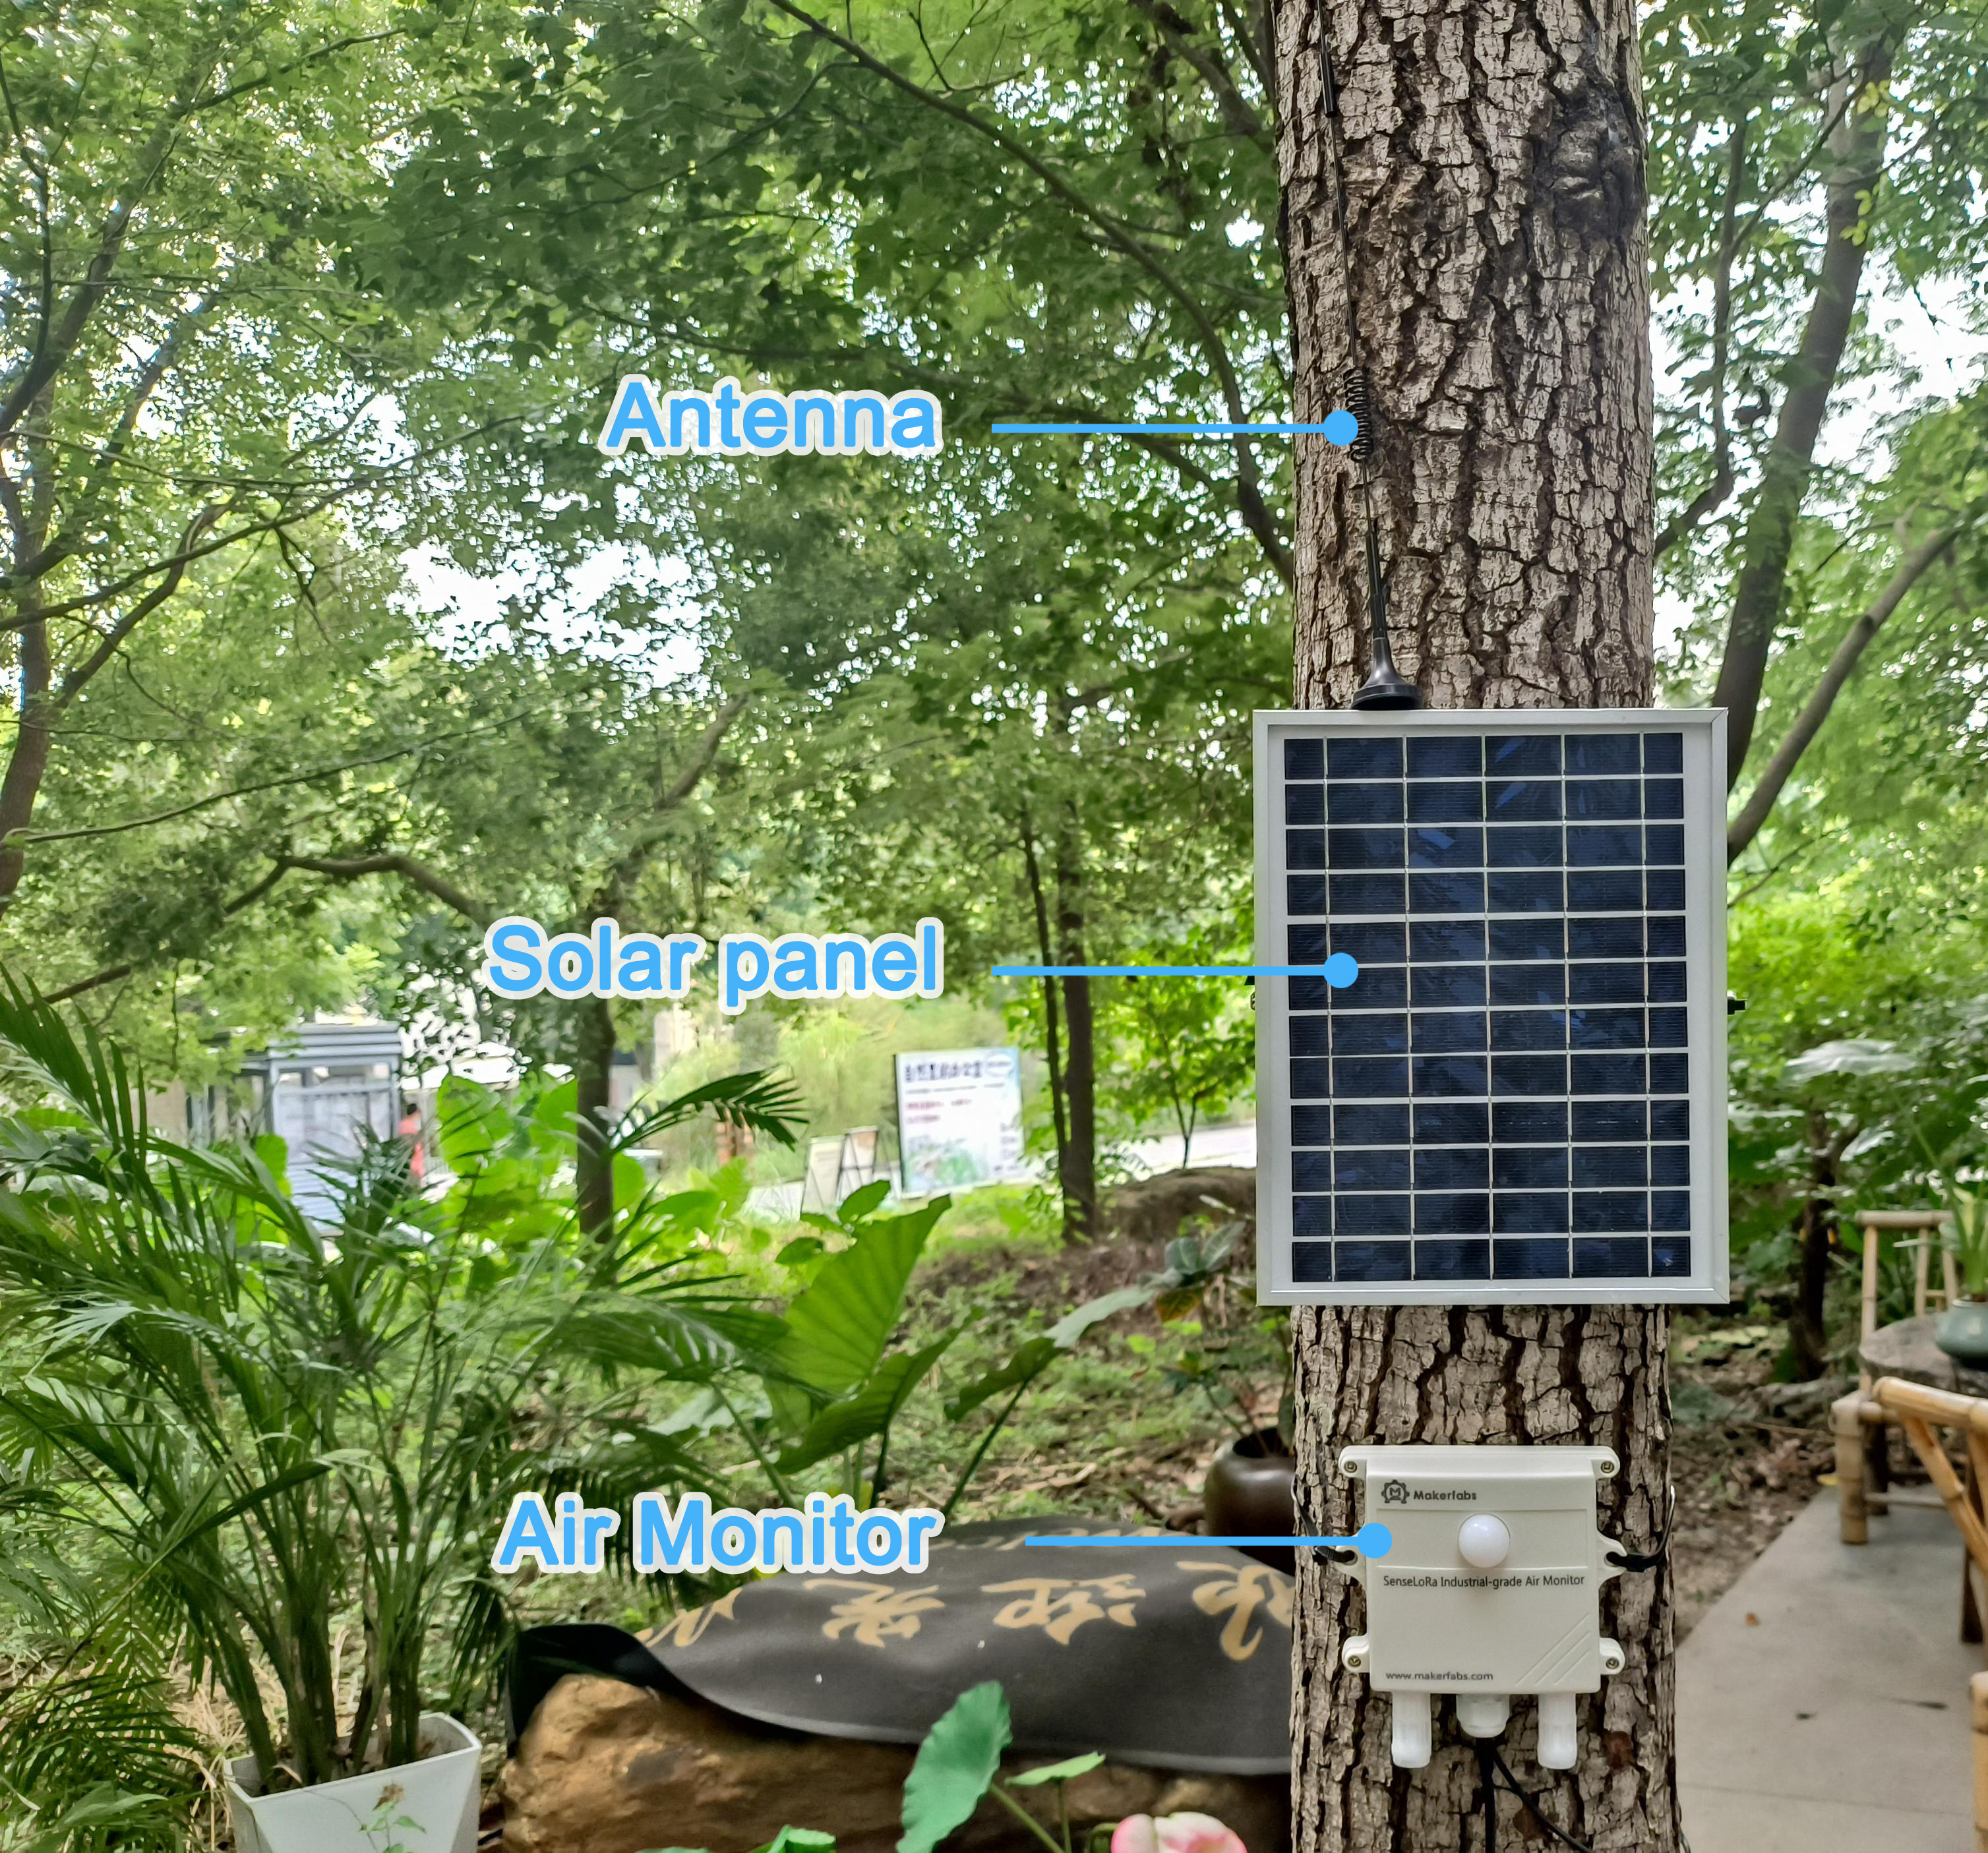
If you are a plant lover, have a well-tended backyard garden, or run a small, self-sufficient farm, an efficient and accurate air monitor is an indispensable companion. While pursuing a green lifestyle, you must also pay attention to energy saving and economic considerations. LoRa technology, with its excellent low power consumption and low cost, fits your needs perfectly. The Makerfabs Senserlora is based on lora technology for small-scale farming. Makerfabs Senserlora currently consists of two monitors (Air monitor and Soil monitor) and two receivers (Receiver and 4G gateway). Now, I will show you the combination of Air monitor and 4G gateway and upload data to Datacake via 4G.
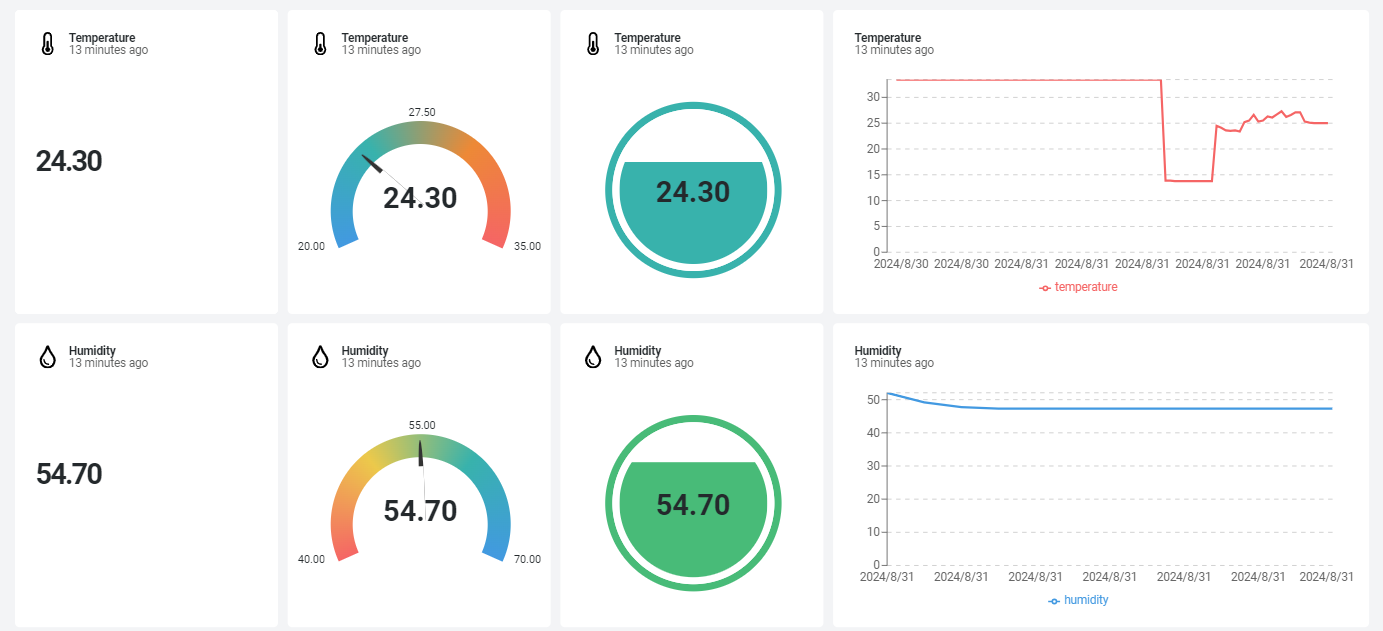
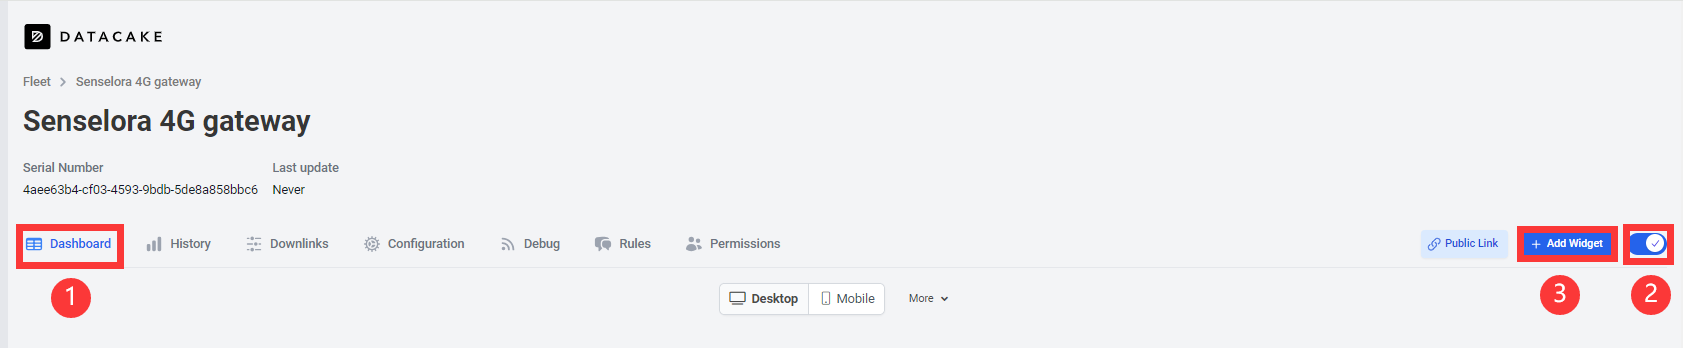
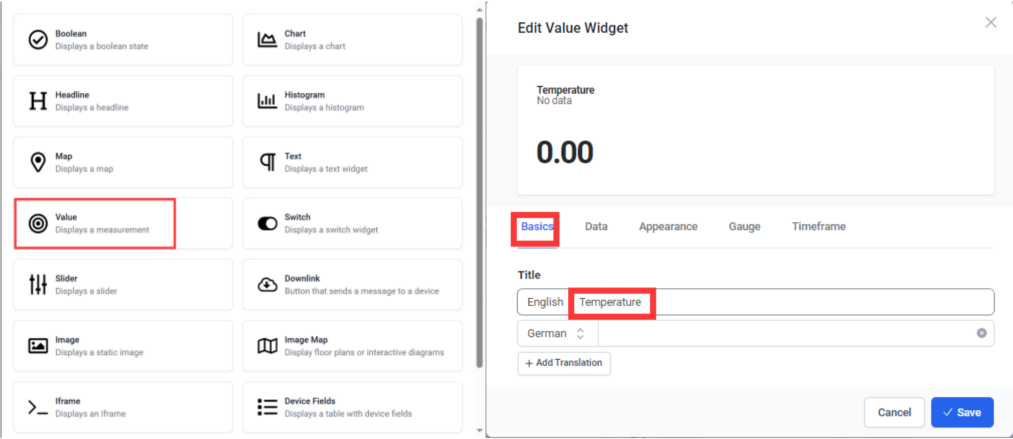
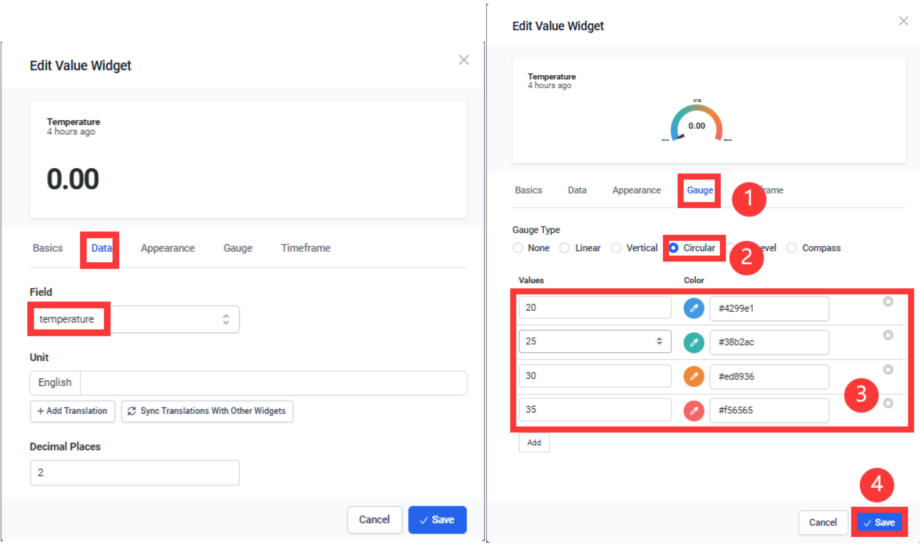
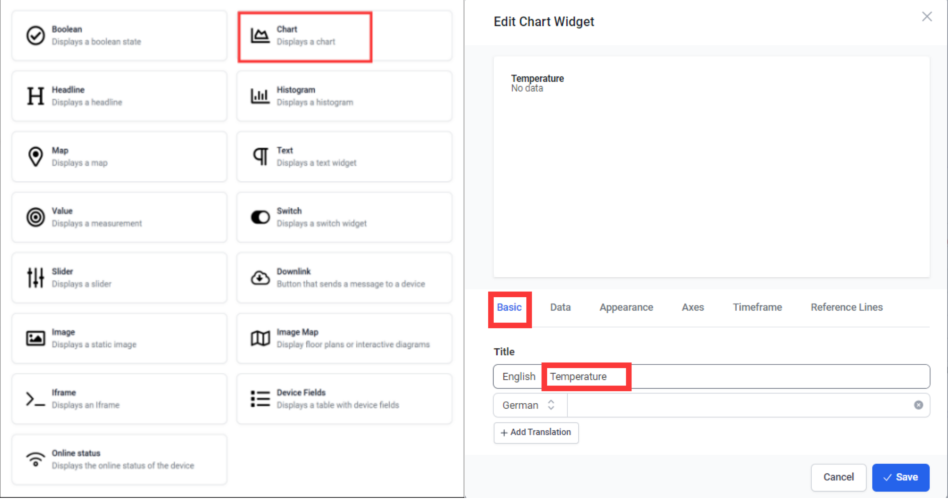
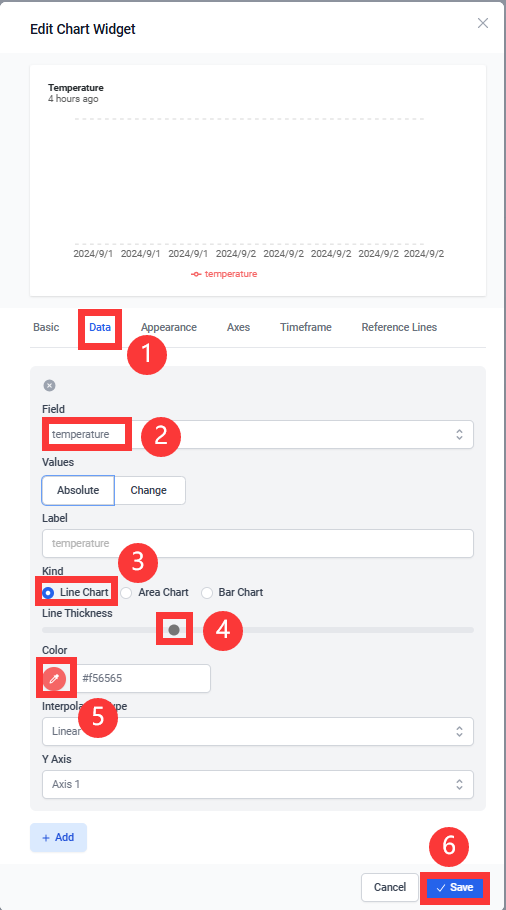
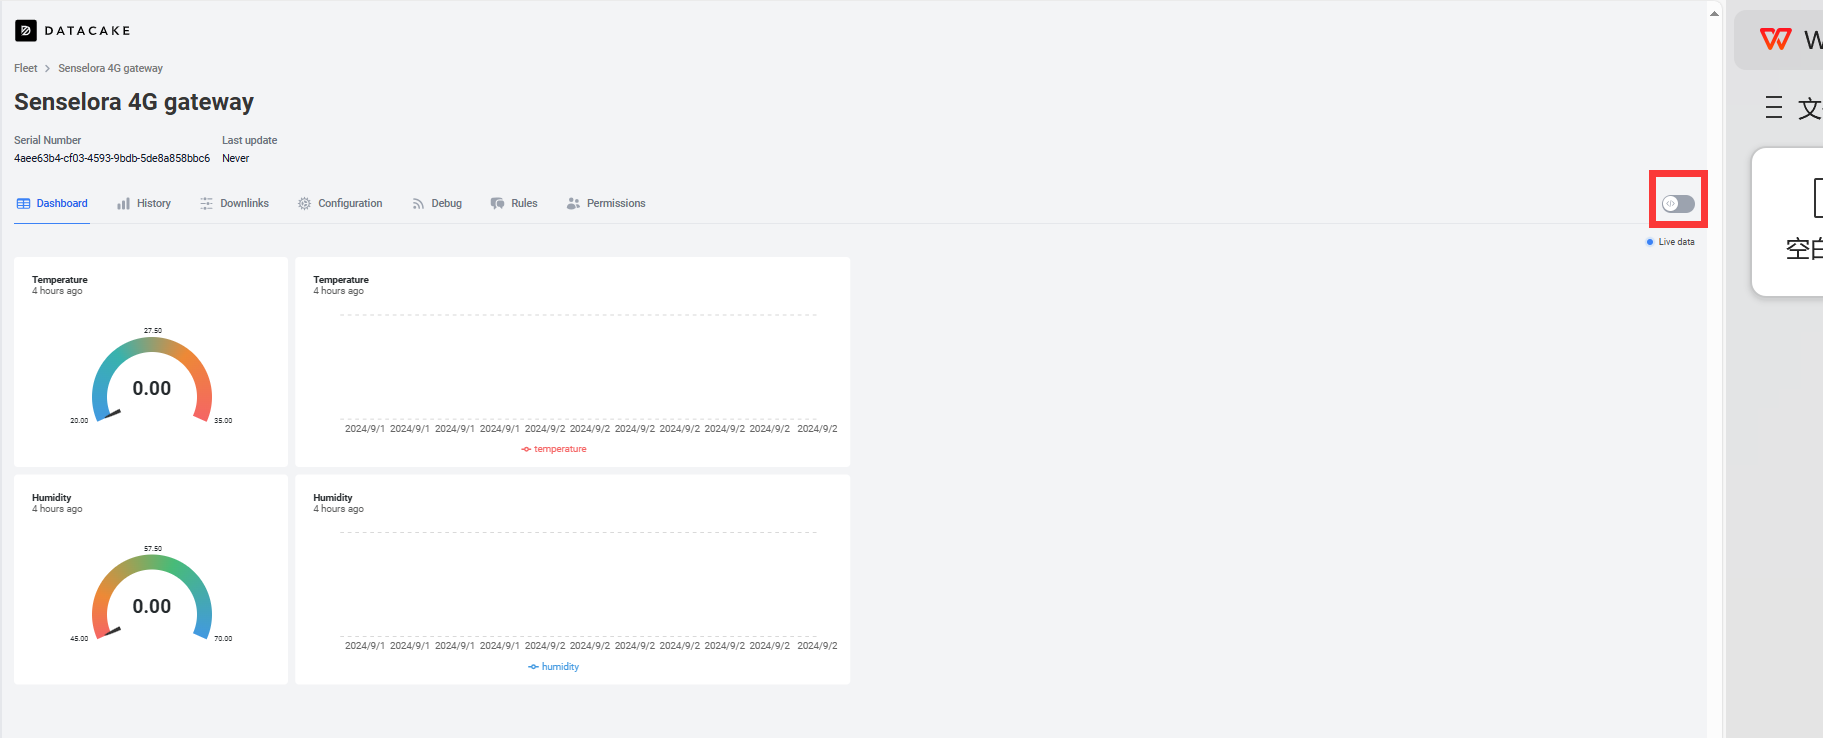
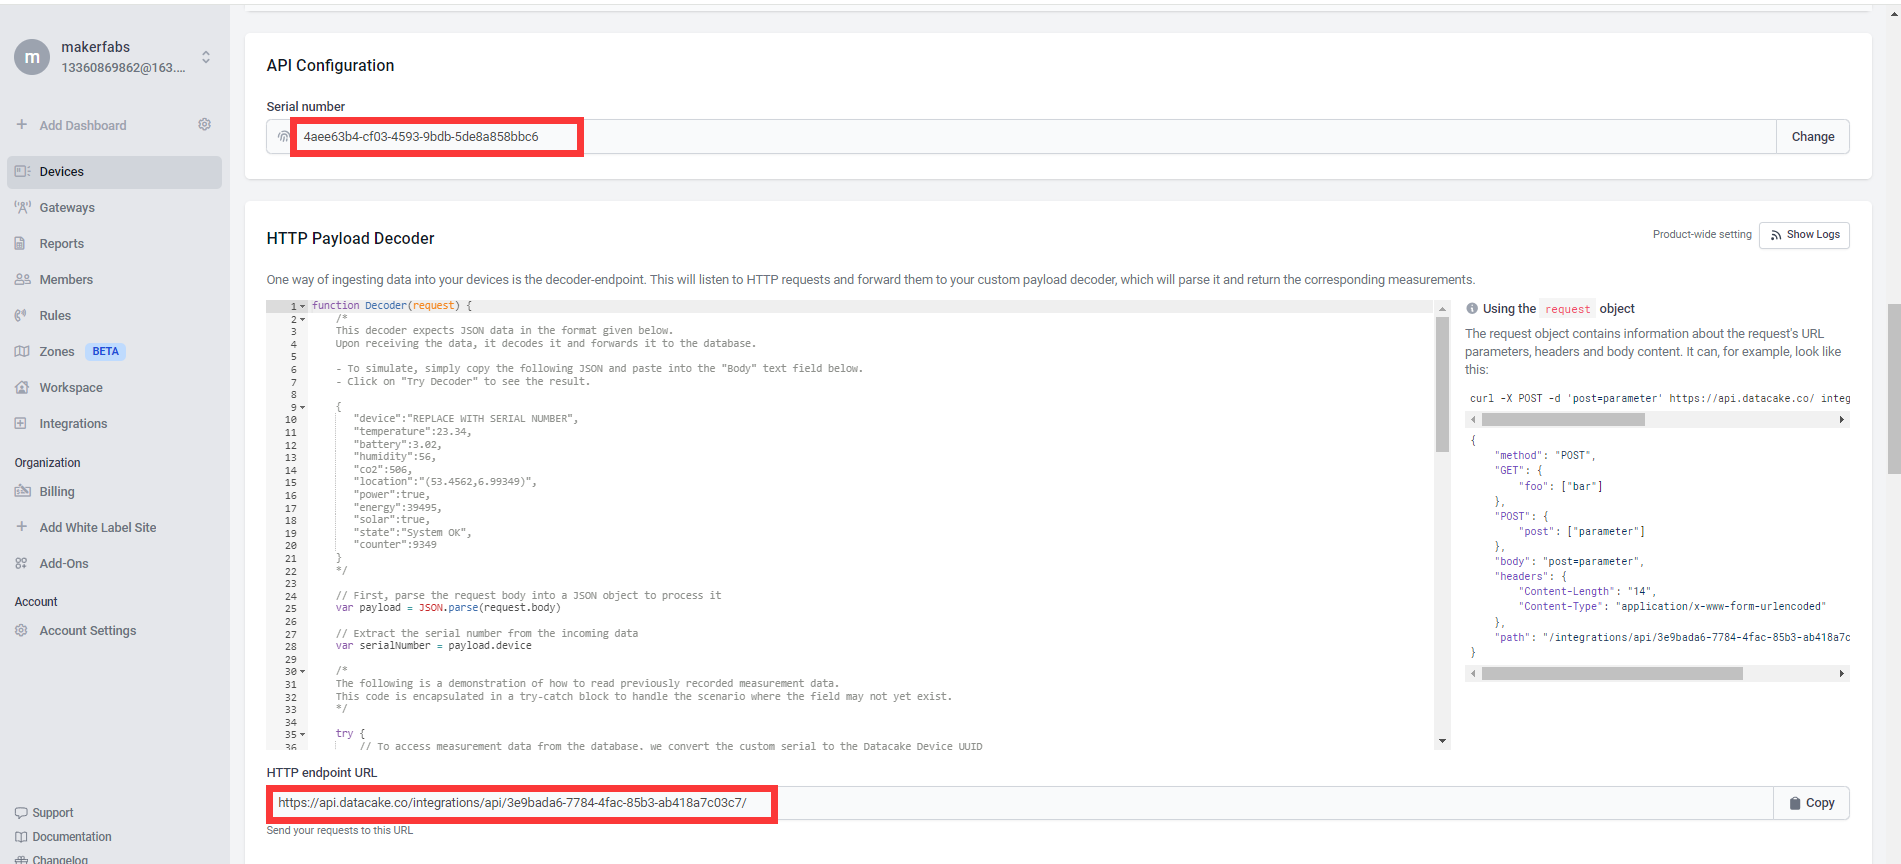
Datacake is a versatile low-code IoT platform. It's easy to add some charts to the dashboard to make your data more visual.
We also made a video that can be viewed here:
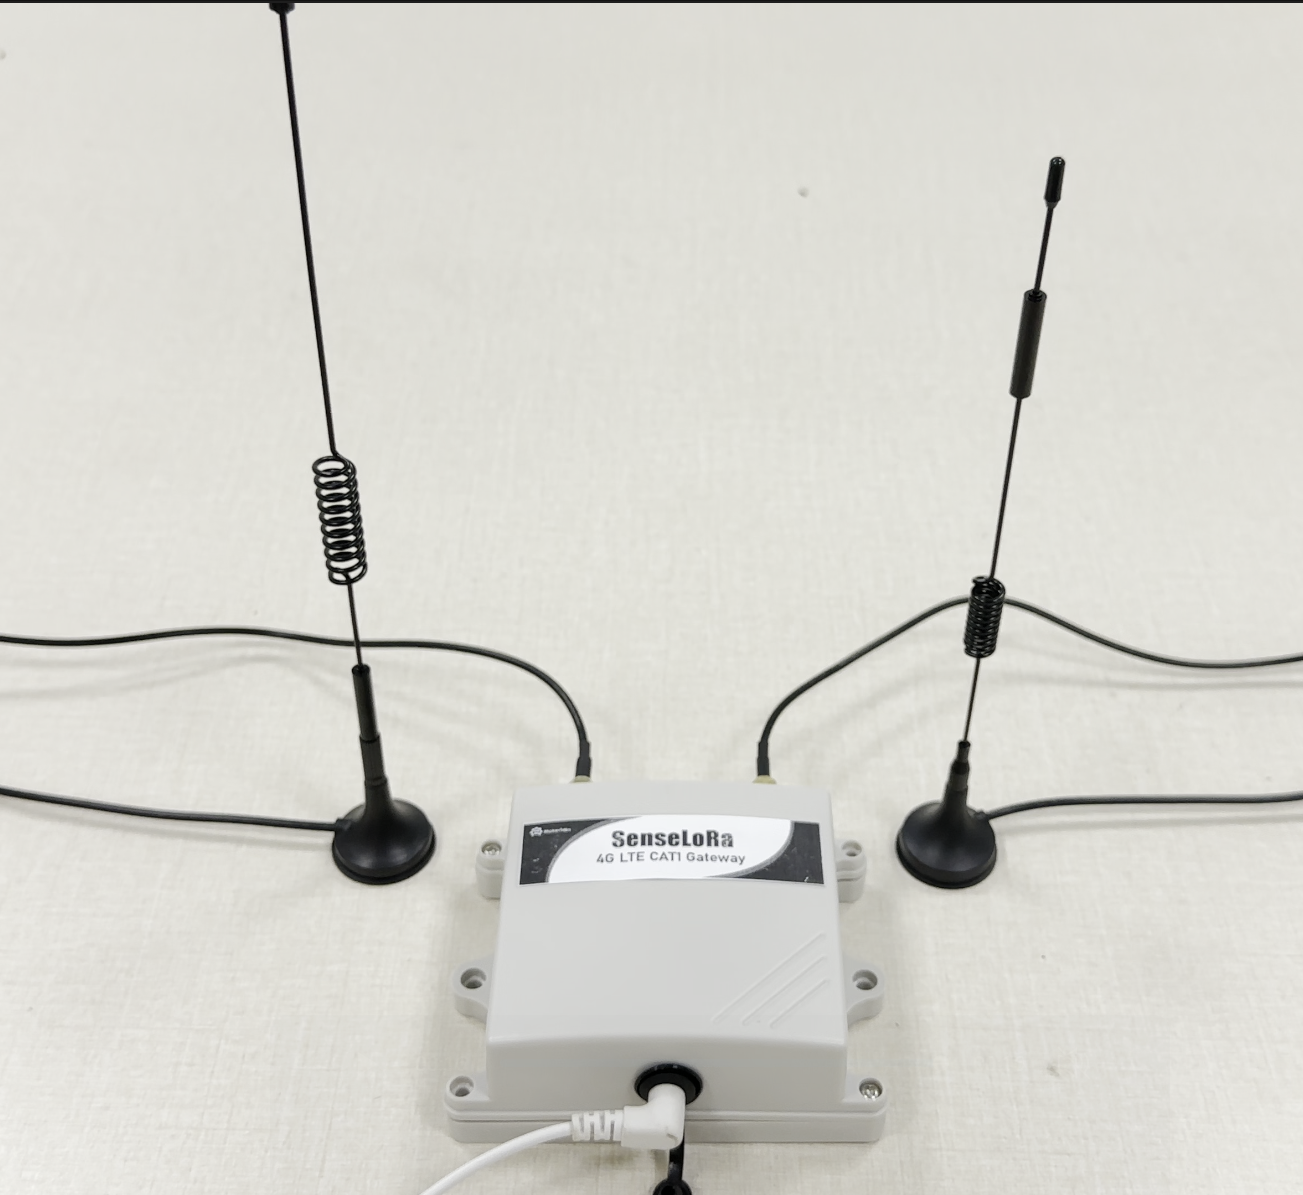
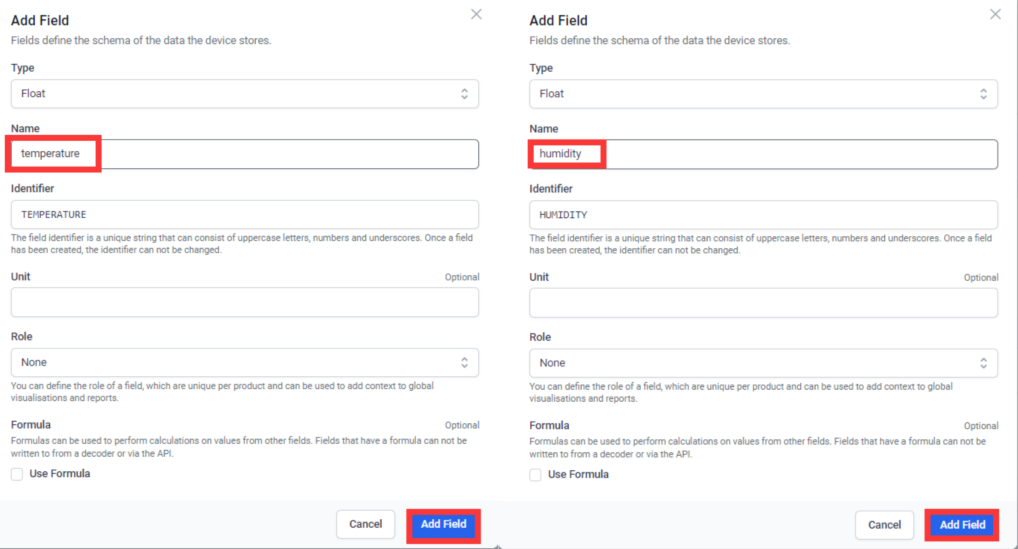
This project consists of three parts, firstly the lora sender, which is our air monitor, it will monitor the temperature and humidity data sent to the 4G gateway; Secondly the lora receiver, which is our 4G gateway, it will receive the data uploaded to datacake; And finally the data visualisation in datacake. In datacake we can display the data in a variety of forms that can be analysed.
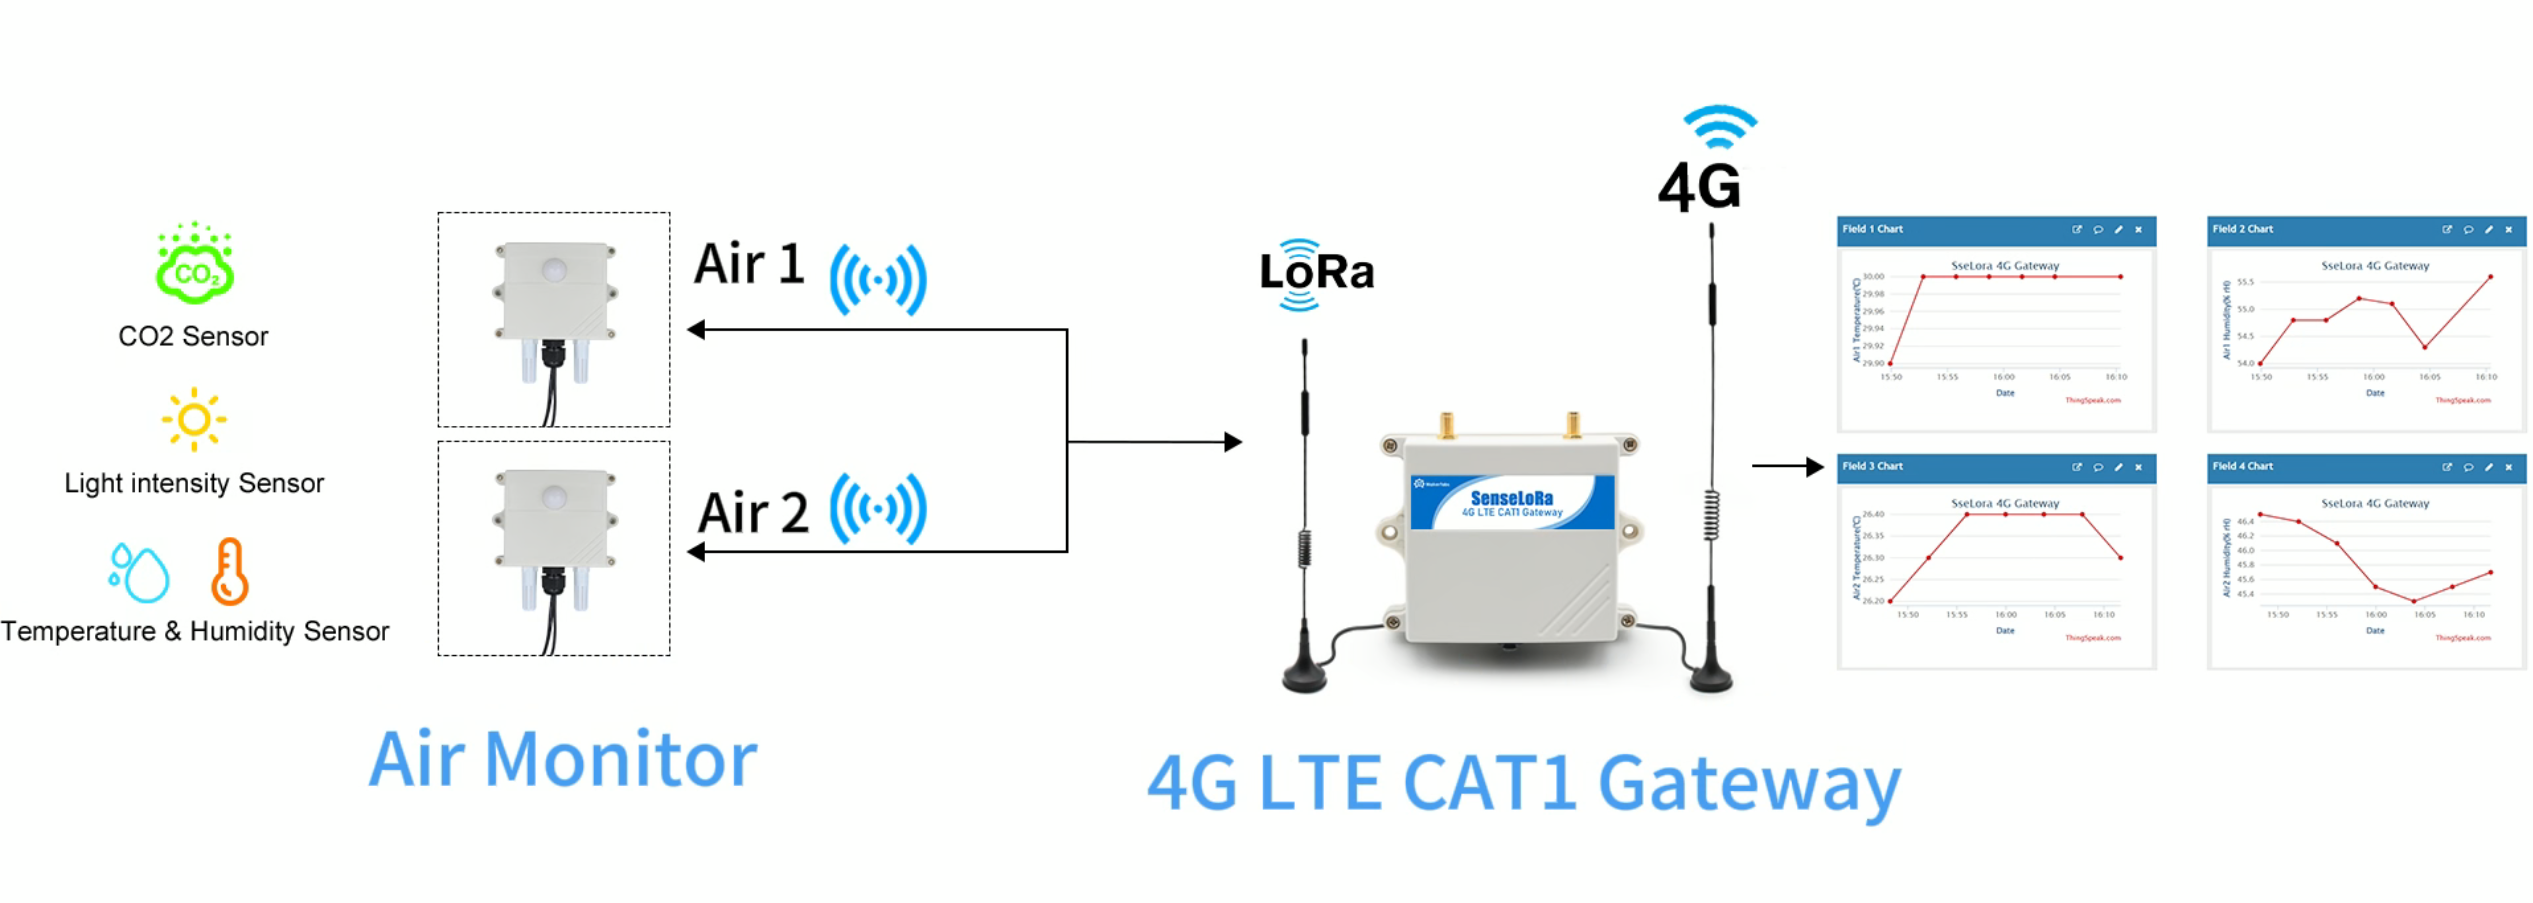
SenseLoRa_Industrial-grade Air Monitor supports the LoRa protocol, which achieves low power consumption, long distance and security. It will monitor the data every hour (of course, you can change the monitoring interval yourself via wifi) and all the sensor data periodically via LoRa P2P, this LoRa signal can be received by SenseLoRa_4G LTE CAT1 Gateway, and thus to display/record/analyze on PC.
The SenseLoRa_4G LTE CAT1 Gateway has an on-board LoRa receiver and a 4G module, so it receives the LoRa data and then transmits the data via 4G to cloud server such as Datacake, or to the monitor's phone via SMS.
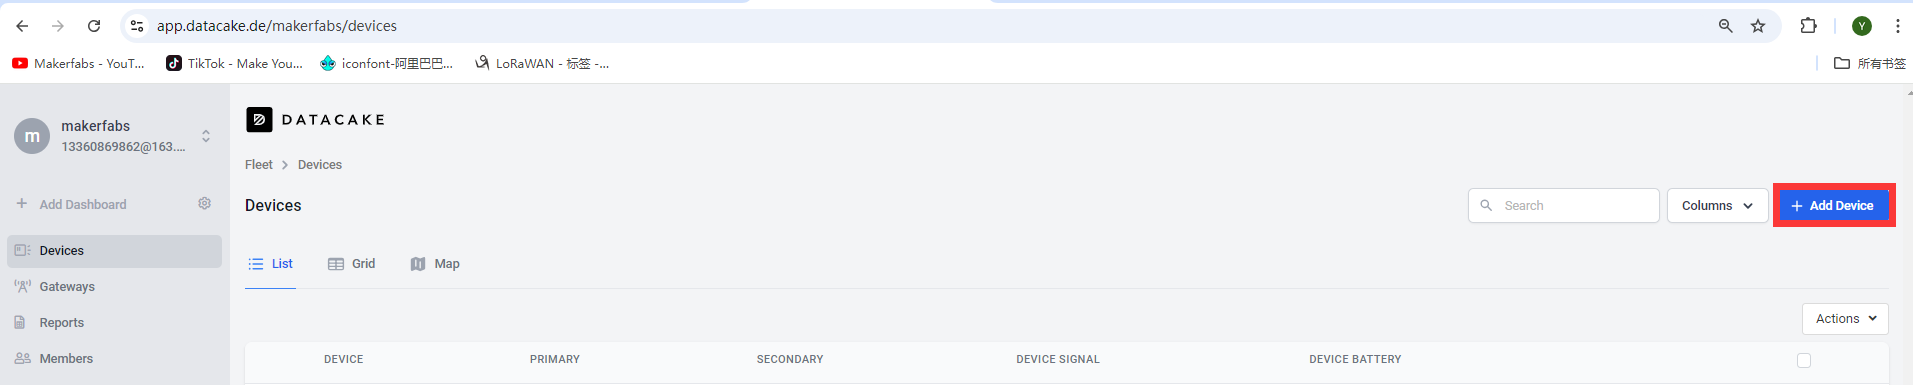
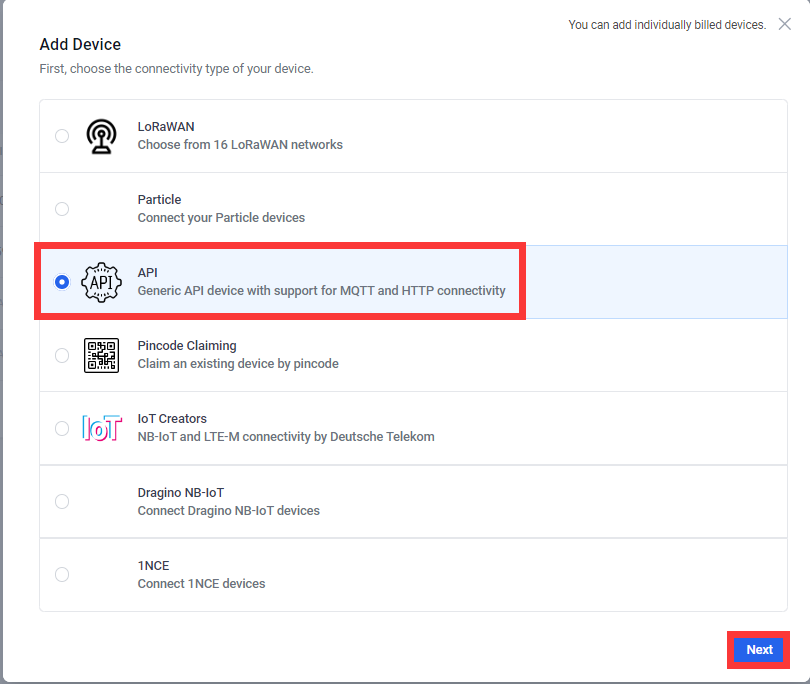
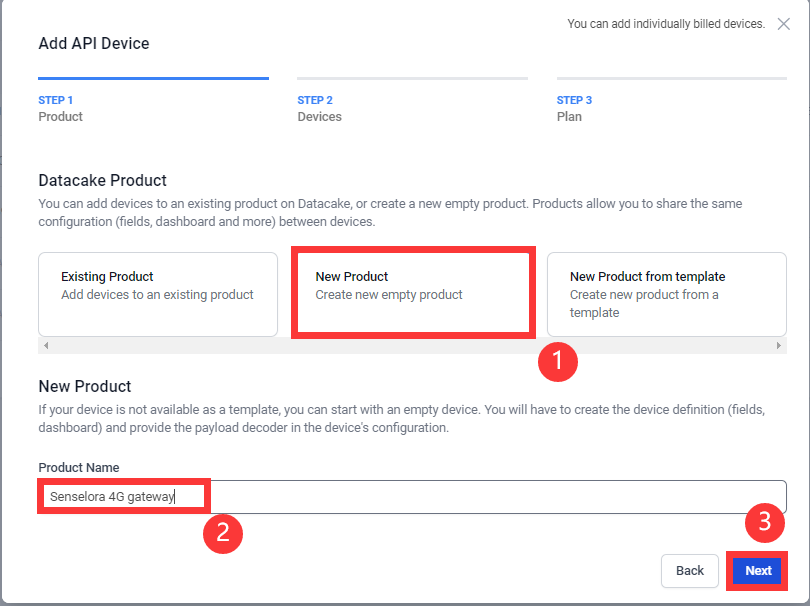
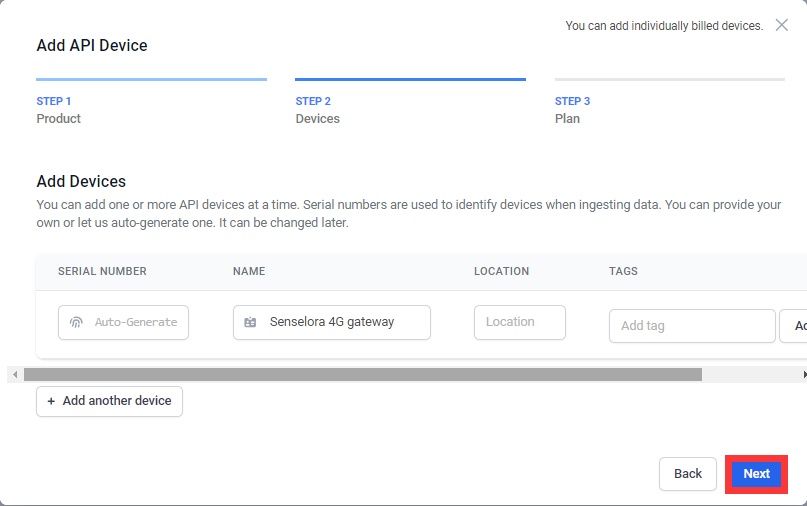

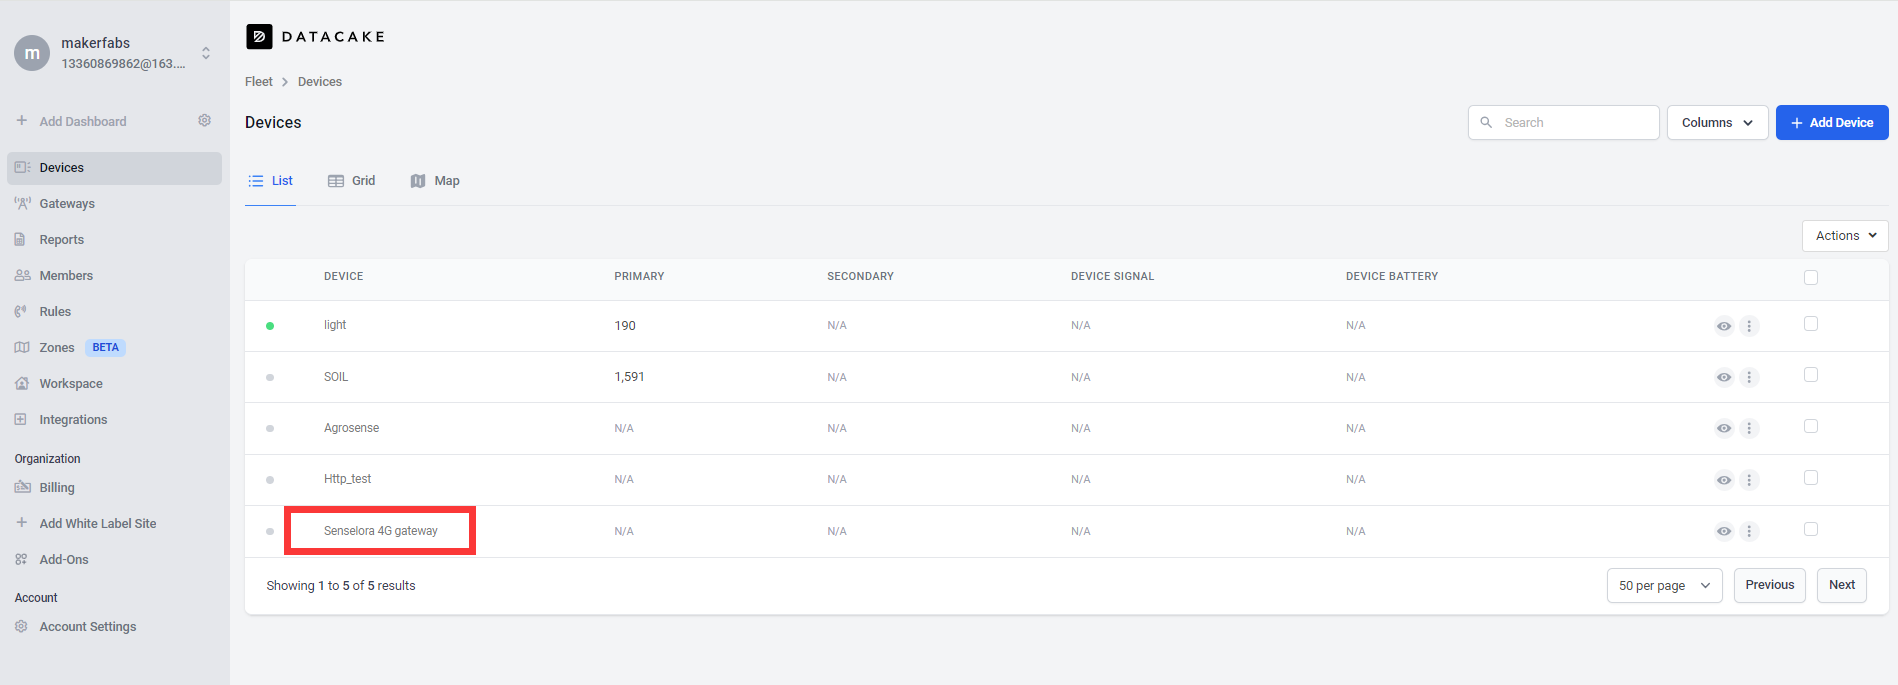


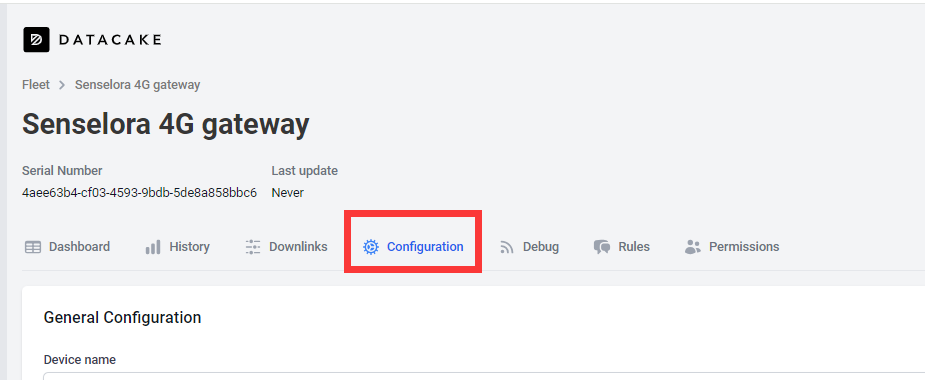
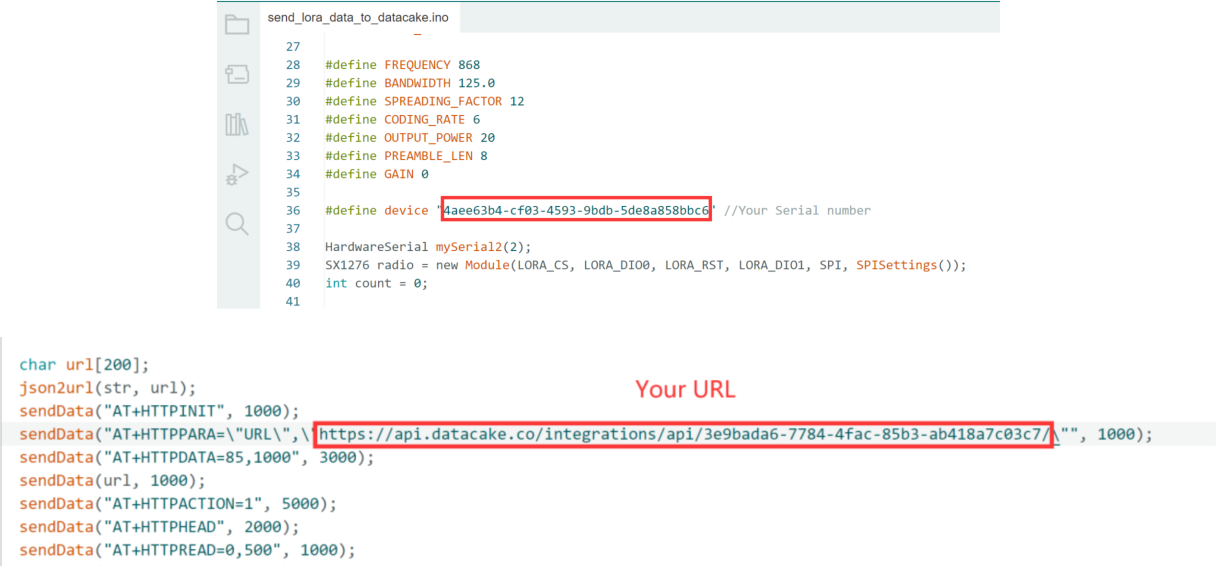
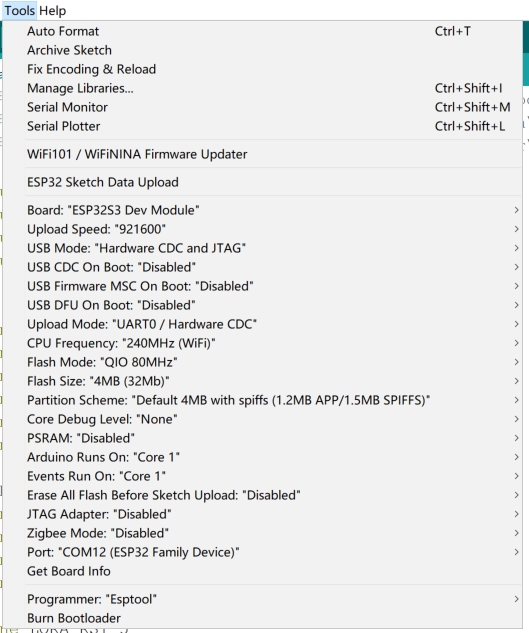
While the Air monitor is a ready-to-use product and the 4G gateway requires us to program it to work.Please follow the steps below to complete the upload of the 4G gateway code.
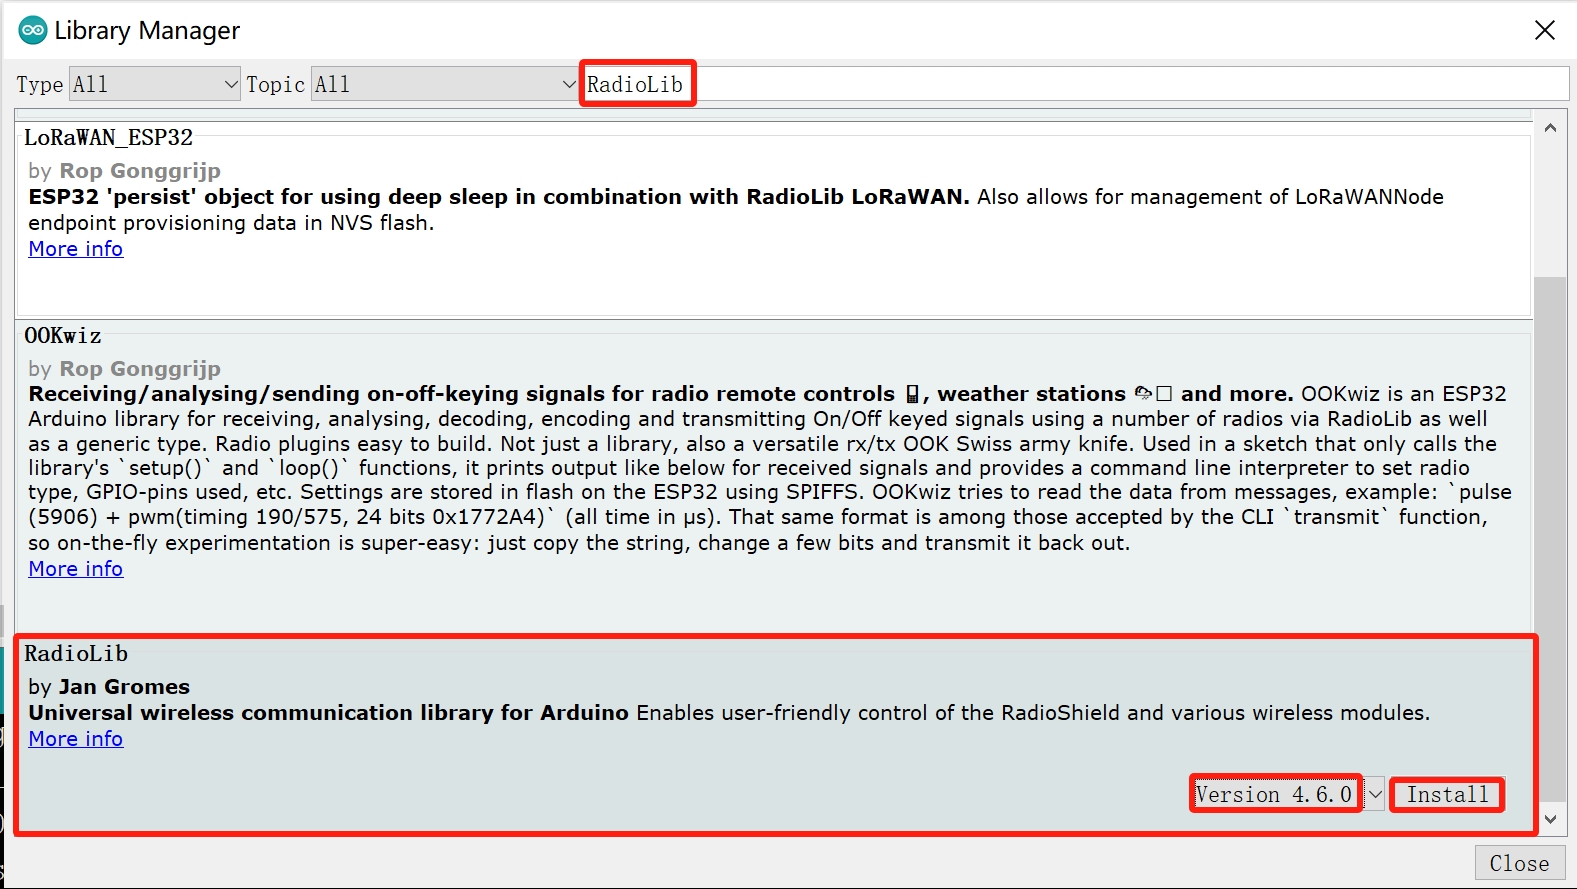
Note: It is recommended to use version 4.6.0, using the latest version may cause compilation failure.

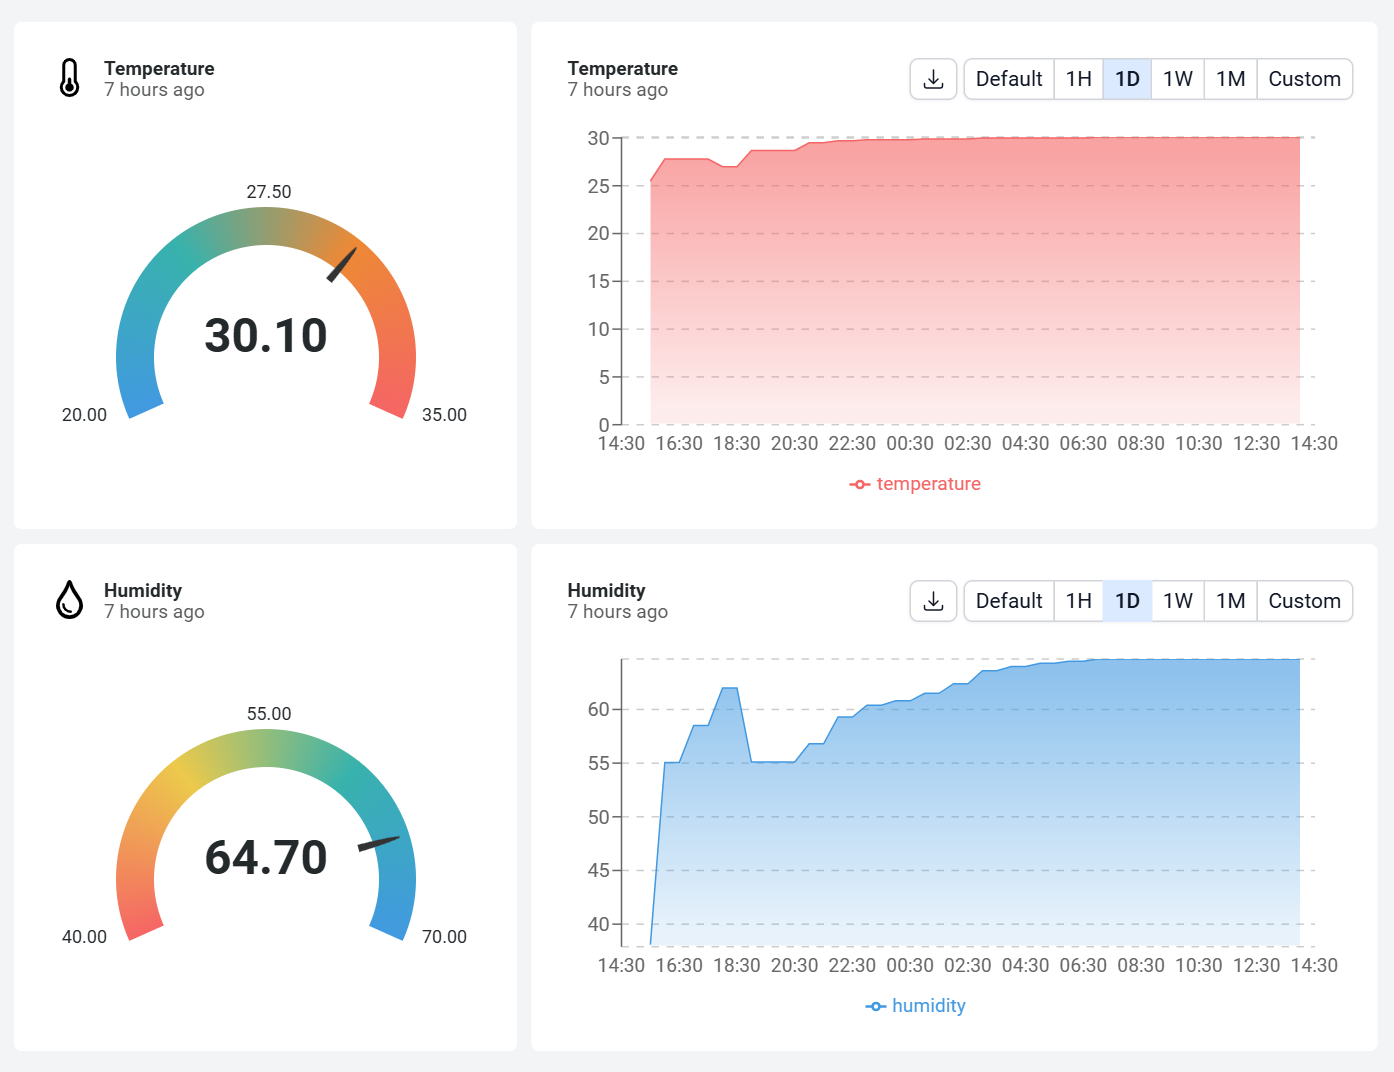
As you can see from the image above, following the steps can be a great way to visualise temperature and humidity information using Datacake, so if you are interested, follow our tutorial and try it out for yourself !


