
MicroPython ESP32 Tutorial - Interfacing Ultrasonic Sensor
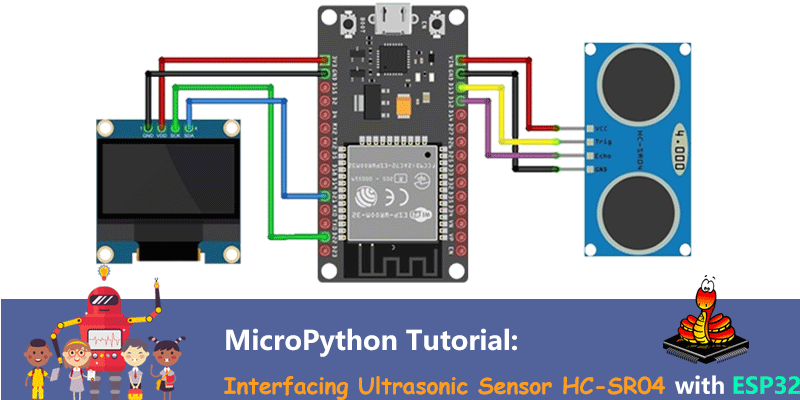
In this MicroPython ESP32 Tutorial, we will be interfacing Ultrasonic Sensor HC-SR04 with MakePython ESP32 using MicroPython Code.
1. Overview: MicroPython on ESP32 with Ultrasonic Sensor
In this project, we will be interfacing the HC-SR04 Ultrasonic Sensor with ESP32 using MicroPython Code. We will use Ultrasonic Sensor with ESP32 Board & 0.96″ I2C OLED Display. We will then write a MicroPython Code in uPyCraft IDE. Using the uPyCraft IDE, we can directly upload the firmware to ESP32 Board.
HC-SR04 is an ultrasonic sensor mainly used to determine the distance of the target object. It measures accurate distance using a non-contact technology – A technology that involves no physical contact between sensor and object.
Before proceeding, you can check this Guide: MicroPython ESP32 Tutorial - Getting Started. I highly recommend you follow this guide as it covers all the basics including setting up the IDE to writing the code & uploading as well.
2. MakePython ESP32 Dev Board
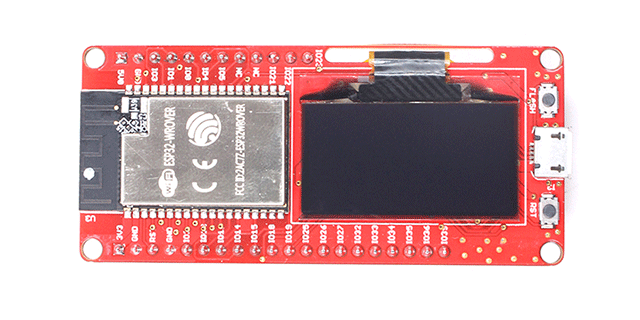
The board contains a combined ESP32 Chip + 1.3″ I2C OLED Display that supports MicroPython. To learn more about this board and purchase it online, you can visit this link: MakePython ESP32 Board. This MakePython ESP32 dev board is cheaper with an additional 1.3″ OLED display and is specially designed for MicroPython support. With 2 versions to choose from, WROOM(No PSRAM) and WROVER((8MB PSRAM).
3. HC-SR04 Ultrasonic Sensor
The HC-SR04 is an ultrasonic distance sensor. This economical sensor provides 2cm to 400cm of non-contact measurement functionality with a ranging accuracy that can reach up to 3mm. The HC-SR04 module contains an ultrasonic transmitter, a receiver, and a control circuit.
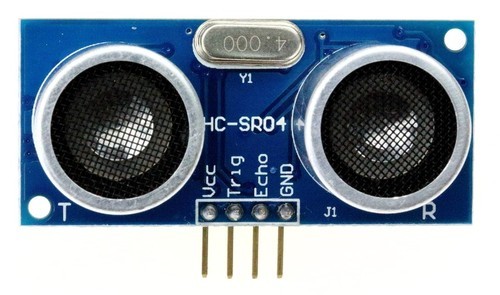
There are only four pins on the HC-SR04: VCC (Power), Trig (Trigger), Echo (Receive), and GND (Ground). This sensor has additional control circuitry that can prevent inconsistent “bouncy” data depending on the application.
To learn more about this sensor and learn its basic application, you can visit this link: Distance Measurement with Ultrasonic Sensor.
4. Interfacing Ultrasonic Sensor HC-SR04 with ESP32 using MicroPython
Here is a circuit diagram for Interfacing Ultrasonic Sensor HC-SR04 with ESP32 using MicroPython Code. The TRIG pin is connected to ESP32 GPIO13 Pin & the ECHO pin is connected to ESP32 GPIO12 Pin. Similarly, the VCC is connected to 5V & GND is connected to GND.

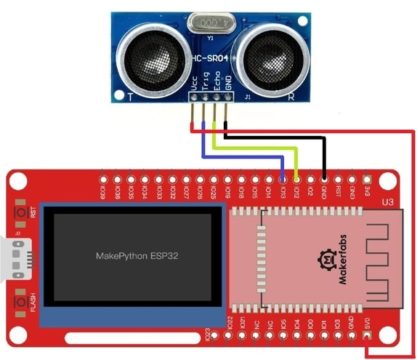
In case if you are using MakePython ESP32 Board, you can do the following connection as shown in the connection diagram below.
5. Source Code/ Program
The MicroPython Code for using Ultrasonic Sensor with ESP32 has three parts. This is because we need a library for HC-SR04 Ultrasonic Sensor and OLED Display.
The three parts include:
1. SSD1306.py
2. HC_SR04.py
3. Main.py
5.1 SSD1306.py
The library to write to the OLED display isn’t part of the standard MicroPython library by default. So, first, we need to upload the library to the ESP32 board.
|
# MicroPython SSD1306 OLED driver, I2C and SPI interfaces currentBoard="" class SSD1306_I2C(SSD1306): def write_data(self, buf): class SSD1306_SPI(SSD1306): |
First, open a new file in uPyCraft IDE paste the above code. Save the file as a name “SSD1306.py“. Click the “Download & Run” Icon. This will upload the file to the ESP32 board.
The uPyCraft console window should the following message.

Now you can import the SSD1306 Library and use it on the Code Part.
5.2 HC_SR04.py
Now open a new tab and upload the following code. The code will upload the Ultrasonic Sensor HC_SR04 Library to ESP32 Board.
|
import machine, time class HCSR04: # Init echo pin (in) def _send_pulse_and_wait(self): def distance_mm(self): # To calculate the distance we get the pulse_time and divide it by 2 def distance_cm(self): # To calculate the distance we get the pulse_time and divide it by 2 |
5.3 Main.py
After downloading the SSD1306.py & HC_SR04.py file to the ESP32 Board, you can now upload the main code. To do that open another file and paste the below code. Save it as a name “main.py“.
| from hcsr04 import HCSR04 from machine import Pin,I2C import ssd1306 i2c = I2C(scl=Pin(5), sda=Pin(4), freq=100000) #Init i2c lcd=ssd1306.SSD1306_I2C(128,64,i2c) sensor = HCSR04(trigger_pin=13, echo_pin=12,echo_timeout_us=1000000) try: while True: distance = sensor.distance_cm() print(distance) lcd.fill(0) lcd.text("Distance:",30,20) lcd.text(str(distance),30,40) lcd.show() except KeyboardInterrupt: pass |
6. Testing the Ultrasonic Range Finder
Once the MicroPython code is uploaded to ESP32 Board, the Ultrasonic Sensor will start showing the distance in cm. You can check the working of the sensor by placing something in front of the sensor.
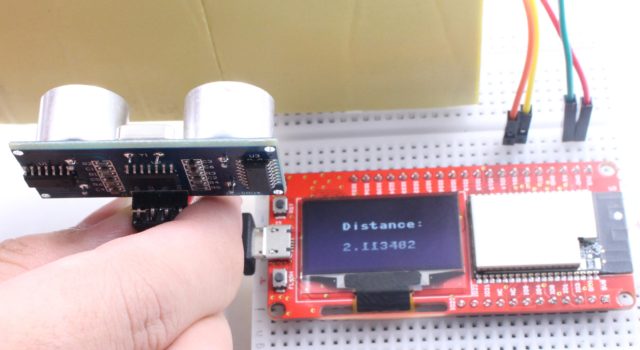
Ultrasonic range finders are fun little sensors that can measure distance. You can use them to find the distance to an object or to detect when something is near the sensor like a motion detector. Because they use sound to measure distance, they work just as well in the dark as they do in the light. It can measure distances from 2 cm up to 400 cm with an accuracy of ±3 mm.
This article is originally posted on How2electronics. If you have any further questions, or need some PCBA customizations based on those MakePython IoT boards, feel free to contact service@makerfabs.com .


 Previous


